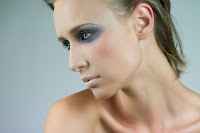
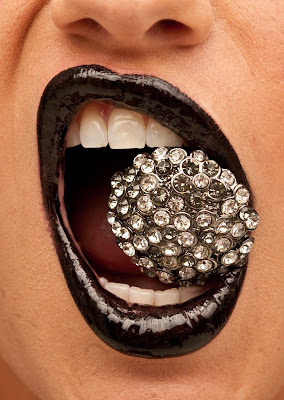
I have recently been focusing on the texture of skin in my images and have been thinking about all the skin smoothing techniques I know to make skin look flawless AND realistic at the same time. So I have added one step to the Katrin Eismann technique in the video in the post below, and I think it really helps to create a more natural skin texture!

Click on the image to see a larger animated gif!
(I took the picture too, fyi!!)
(I took the picture too, fyi!!)
In the video in the post below you learn how to use the channels to make a selective color layer and blur it using surface blur. I have this made into an action in my photoshop actions. What I have been doing recently before running that action is pressing {shift + option + command + E} this is the keyboard shortcut for Merge Visible and making a new layer that contains all the changes I have done thus far to the image.
Then you go to Filter -> Other -> High Pass.
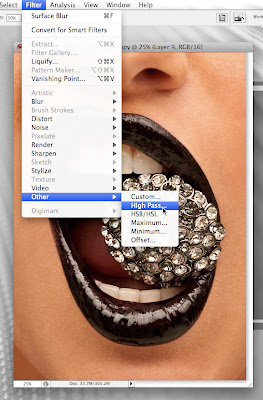 Once you are in the High Pass screen, drag the image zoomed into 100% in the box to a part of the image that has skin in it. So you can see the pores.
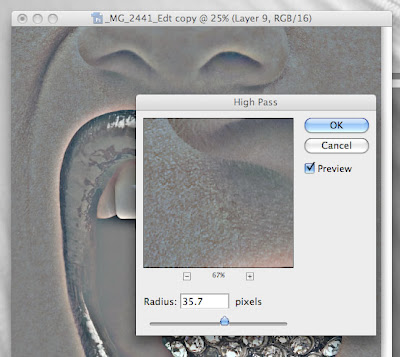 Slide the radius slider until you can see the pores very well. Then press ok.
With that layer now selected, press {command + U} to unsaturate the layer completely.
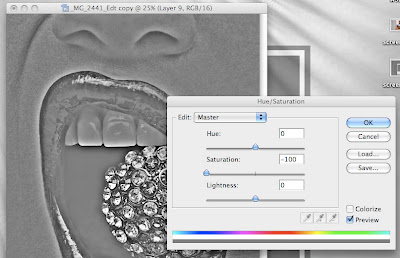 Next you will change the blending mode of that layer from "Normal" to "Soft Light."
You will need to turn off the visibility of the layer you just made by pressing the eye next to the layer so that it is invisible. Then drag the layer below a visible layer.
Then, press {shift + option + command + E} again to make another regular layer without the high pass. With that layer selected, do the Katrin Eismann skin smoothing technique shown in the post below.
Once you have completed that, bring the high pass layer back to the top of the layer pallet and mask in the skin detail on top of the layer where the shin was smoothed. It will bring back the detail in the skin and it will look like your model has flawless skin!
Before:
After:
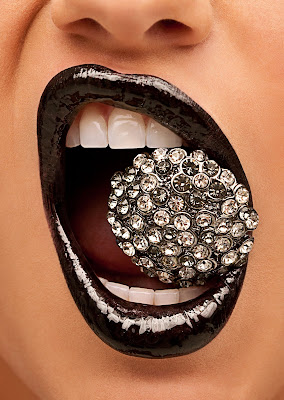
Obviously, there are a few more things that I did to this image to make it really pop but most of it was clone tool and stamp tool stuff, and I didn't want to make this post too long.
Please post your comments by clicking the link below. If you've got questions, please pose them in our Retouchers and Retouching Discussion Threads.
READ MORE (Full Post and Comments)
