
Have you ever almost had that perfect shot from a vacation or shoot where one of the most important parts of the picture is out of the frame? One of the things I have learned through my retouching is to think outside the box...I mean frame! Just because your canvas ends doesn't mean your photo has to! Ill show you how!
LEARN HOW By Clicking READ MORE...
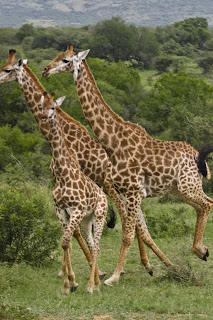
On my trip to South Africa, we went to a game park and I had no idea how close the animals would get to us so while I was prepared with my 70-200mm and a doubler (2x), I was caught at a disadvantage when the animals got close to me without enough time to take off the doubler. This was the photo that I was left with.
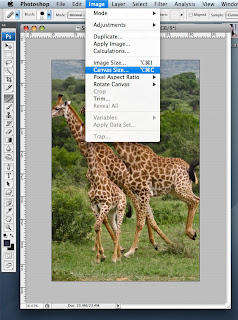
Step One: Increase the canvas size. You are going to want to go into Image>Canvas Size and open up your canvas to be larger than the original image because you will be adding things to it.
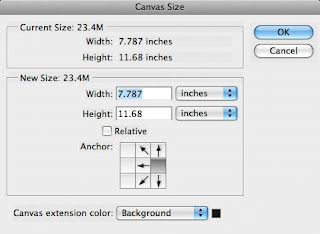
When you get into the Canvas Size window, you will see a nine by nine square with arrows in it. This tells you where the image will sit on the canvas when the extra canvas is added. Since I want to add more canvas to the left side of my image, I have chosen to change the gray square one over to the right by clicking on it.
Step Two: Start rebuilding the part of the image that is most important. In my case, the part that is most important is the giraffe's mouth. Since I have another giraffe in the same photo that is not cut off, I have selected those pixels to copy and paste over to the giraffe that is cut off.
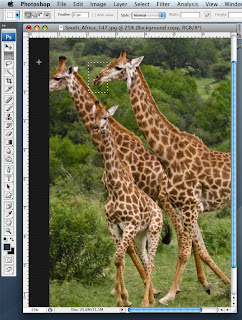
Select the mouth with the marquee tool, and press (cnt/cmd) C to copy and (cnt/cmd) V to paste. Don't be alarmed if you don't see the paste effects. The selection has been pasted directly over the original pixels so you may not see them at all. Then press (cnt/cmd) T to transform and (cnt/cmd) H to hide the lines (it will be easier for you to line up the edges if you can't see those white lines. Use the arrow keys to move the copied selection into place. Once it's in it's place you can press the enter key to accept the transform or the check mark at the top of your toolbar.
Once again that is: (cnt/cmd) C, (cnt/cmd) V, (cnt/cmd) T, (cnt/cmd) H.
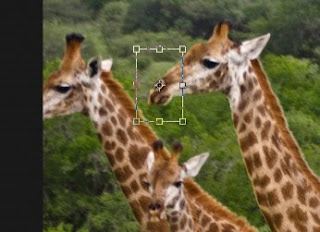
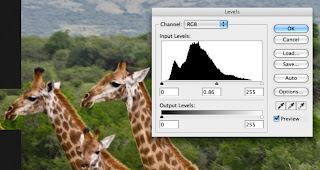
Step Three: I saw that there was a small color change between the first giraffe and the second, and I needed to fix that. Press (cnt/cmd) L to bring up your levels pallet
and take down the midtones a tad.
Step Four: Start building the other areas of the image. The more prominent the features are in your background, the harder this part will be for you. The biggest suggestion I can make for you is not to grab pixels from the same area and use them to fill in the black area. You will end up with the "bad clone stamp effect" as I like to call it.
Peoples' eyes and brains are constantly looking for patterns in images thats why they are so easy to spot on a bad photoshop job.
This bush was important because it is a large part of the picture. So I knew I needed to continue it on in my black space. I copied it and pasted it like I did in step 2, but this time since it is going to be the opposite side of the bush, I needed to flip this piece of the image vertically so it would look like the other side of the bush.
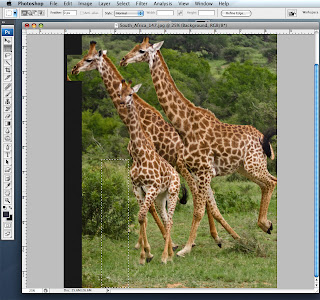
Press (cnt/cmd) T to transform your selection and while holding down shift, drag the box/line on the right side of the box all the way past the left line and over further. Now you have flipped the selection. Press enter to accept the changes.
Do this a few more times from different parts of the image so you don't create any patterns.
Move the selections into place using the arrow keys or your pen/mouse.
This is what your image should look like after you have filled in the space on the left of the photo with different areas of bush from around the photo.
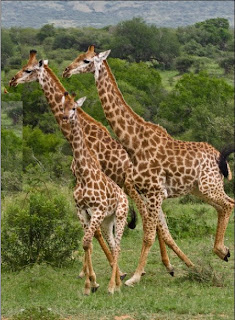
Here is a close up image:
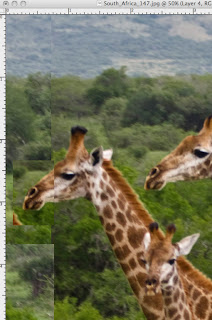
The next step is to use the clone stamp and healing brush to get rid of those lines in your image.
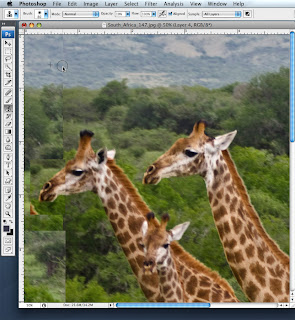
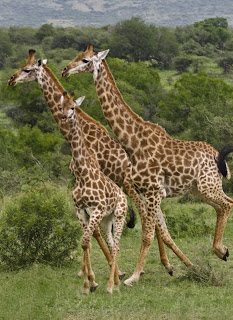
Here is your final image! Congratulations!
Please post your comments by clicking the link below. If you've got questions, please pose them in our Retouchers and Retouching Discussion Threads.


2 comments:
Love what you've done with the giraffe! You make it look pretty easy. thank you so much for the "how to". I can't wait to see more!
Great Tutorial. Thank you so much for sharing... I often have missing parts in my images...
Post a Comment