
Have you ever come across a situation with under eye circles and try to tried to use the healing brush and the clone stamp to cover them up but then get frustrated with the textures don't match? Well that has happened to me plenty!! I watched a tutorial by Chris Tarantino about a month ago when I was down at LOOK3 in Charlottesville Virginia that made an interesting point. Its not so much the texture of the skin that needs to change, but more the pigmentation and color.
In doing my own research to try and combat under eye circles (much of which are caused my stress and over working :); I have found out a little bit of background information that may come in handy when thinking about ways to rectify them in photos. The skin under your eyes is much thinner than the rest of your skin on your face, thus is more transparent. Un-oxygenated blood settles under your eyes and can be seen through the thin skin that lies underneath your eyes. This is what causes dark circles. (Disclaimer: I am a photographer, not a doctor).
Heres a way to retouch out dark circles without touching the texture of the skin at all. And as far as I am concerned, the best way to tackle under eye circles.
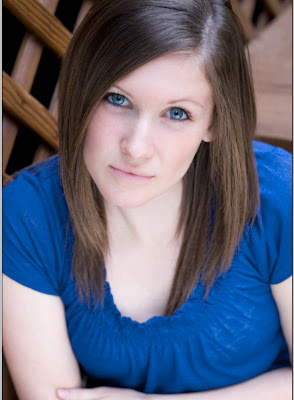
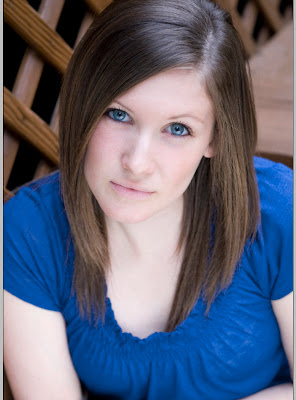
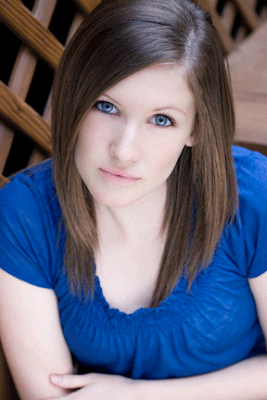
Here is the unretouched image in its original state. As you can see, she's already a gorgeous girl that doesn't need much retouching at all. This is just to show the example.
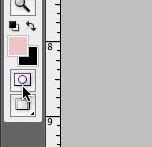
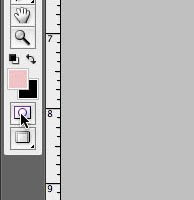
I started by clicking the quick mask button on the lower left part of your tool bar.
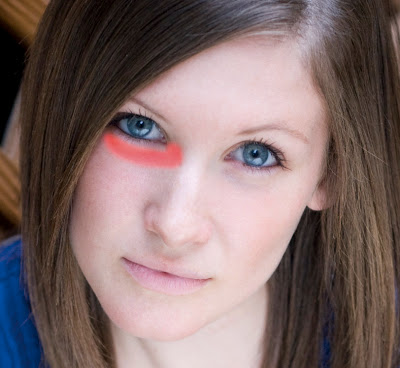
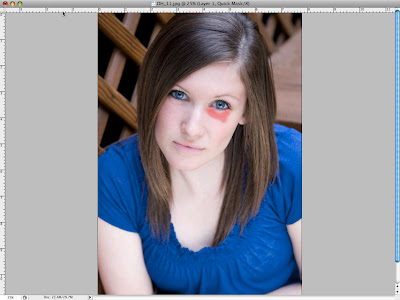
 Then with a soft edged paint brush, draw in the area that you want the effect to be applied to. Make it look like your subject has a black eye (but in this case, it's bright red).
Then hit the Q key to exit out of quick mask mode and second, hit Shift+Command+I to select inverse. You should now have marching ants around the area you want to focus on.
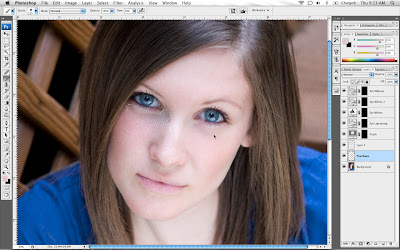
With your selection still present, go to Select-Modify-Feather to feather the area by 15 pixels. Then REPEAT.
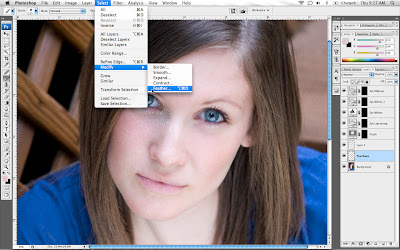

After you have feathered your selection, you can Command+H to hide the marching ants.
 Now go to your adjustment layers icon and click on a curves adjustment layer.
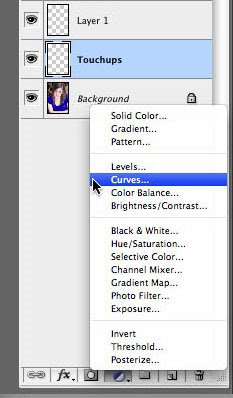
On the RGB Channel, take your midtones up until they match the surrounding skin brightness. Make sure you have the Preview button checked so you can see the changes in the image as you play around with the curve.
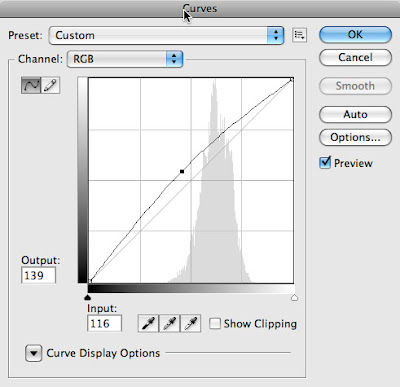
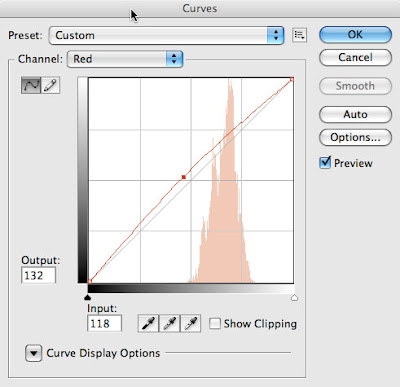
Then change your channel to the Red channel and increase the midtones there as well. This will increase the saturation of the red times in that area to combat the blue that is there to begin with.
Heres what the left eye looks like after the changes.
Then I repeated the whole thing on the other eye. Clicking on the quick mask button.
Then drawing in the area that I wanted to changes to be applied to by using a feathered brush to color in under her other eye.
Then hit the Q key again to exit out of quick mask mode and second, hit Shift+Command+I to select inverse. You again see marching ants around the area you want to focus on.
Then repeat the feathering of the selection by going to Select-Modify-Feather to feather the area by 15 pixels...again. Then REPEAT.... again.
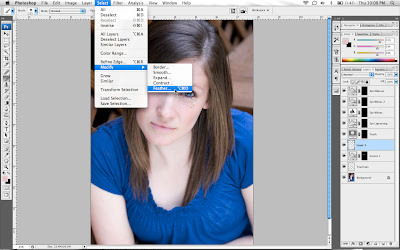

Once you have feathered your selection, you can create another curves adjustment layer.

Make the same changes to the right eye as we did to the left on both the RGB channel and the Red channel.

 The reason you do the two eyes differently is because 9 times out of 10, one single adjustment won't work for both eyes.
Here is the finnished product! Good job guys!!
Please post your comments by clicking the link below. If you've got questions, please pose them in our Retouchers and Retouching Discussion Threads.


12 comments:
On my NYC headshots I use a combination of the clone tool set to "Lighten" and the clone tool set to "Darken", applied with a pressure sensitive Wacom tablet.
You can also use the clone tool set to "Color" to adjust color differences. It's a quick method that keeps the skin tone, texture, etc intact.
Great blog!
Under-eye work is just such a standard piece of retouching. This is very helpful as well as a few additional tip in this first comment.
Thank you! This approach is giving much better results than my stamp tool or healing brush/fade technique.
Or easier just use the clone tool.
Thanks for this. Nice idea.
Just discovered this through Strobist on Twitter. Thanks for the tut. Every lady I shoot wants me to "fix" something.
This is a good example of how to do this - however, I would question your use of the quick mask + feathering? This obviously works, but adds several extra steps to the process. As an alternative:
- duplicate the layer
- make the required adjustments as metioned (this will effect the whole of the duplicated image, but just adjust settings until the area you want to effect looks right)
- add hide all mask
- using a feathered white brush and appropriate amount of apacity paint over the area that you want to show the changes for.
- if this does not look quite right, then you can just reselect the duplicated layer and make adjustments to color etc until it looks the way you want.
just my 2 cents worth....
good tip on adjusting the reds rather than cloing though. will have to give it a try.
My technique is to usually just use clone tool at 30% opacity with a fat feathered brush. I find that this delivers good results most of the time.
Thanks to everyone for their comments. I greatly appreciate hearing from you!
Gearu: I do understand your apprehensiveness to use the quick mask feature but it's a good alternative when you are worried about file size. Every time you duplicate a layer, you are ostensibly doubling the size of the image you are working on.
This leads to a very large file and potentially, a slower working pace. By using as many adjustment layers as you can, you keep the file size down, thus being able to work faster and take up less room on archive disks.
(I dont even do my starting patch and healing brush blemish removal on a duplicate layer. Instead I do it on a new layer that has nothing on it and I tell my brush to sample current layer, and all layers beneath it.)
Hope this helps!!
Have a great weekend everyone!
Hi guys, Me again.
Lots of comments about the clone tool.
Let me address:
The clone tool is fine to use for a quick fix, but the problem is you loose the texture of the skin and you loose the appearance of the pores and all the small hairline wrinkles that everyone has.
Its one of those tell-tale signs that your photo has been retouched.
It might be a little bit of extra work, and mind you if you are happy with the process you use then by all means keep using it :) This is just an alternative method, since there are a million ways to do everything in photoshop!
Nick Coleman nailed it here, in my own workflow I use the clone stamp on a new layer method. Clone stamp blending modes are massively under-utilised.
I always have at least one duplicate of my background layer, my TIFFs and PSDs are usually well over 200Mb :)
I'm just finishing up my website at www.dmeadowsdesign.com and I'll be adding tutorials and links over the next couple of weeks so pop over, it's always good to have people to debate photoshop techniques with :) There are so many ways to make one adjustment.
Danny
Thank You :)
I just did it and its amazing!
Post a Comment