Read after the jump to learn how.
READ MORE (Full Post and Comments)
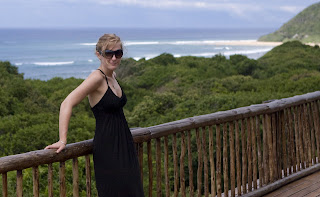
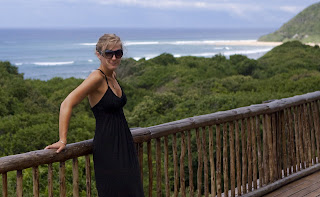
And here is the rest of it.We start off with a photo of a girl that is not quite as tan as she would like, so we will take the necessary steps to change that for her.
 Step One: Create a blank later and fill it with a brown color that is derived from the skin tine of the girl.
Here you will need to change what you fill the layer with so it says color.

It will prompt you to pick a color wit h the color picker. My preference is to start with a color on your model already and then pick a color slightly warmer and slightly darker than what you sampled from the model.
 The circle is the color that I sampled from the model and the arrow is the color I chose to use as the fill color for the layer.
Step Two: Change your blend mode to overlay.

Step Three: Add a layer mask by OPTION clicking on the button below. This will give you a mask that is completely black so nothing will be showing.

Click on the mask itself and paint with your brush tool with the color white over the area you would like to be affected by the color.
 Once you have completed your mask and it looks like everything is painted in, you can option click on the mask on your layer menu and you can see your mask. I painted at 30%-40% opacity with my brush so you can see some of the brush strokes that were left.
  To blur some of the brush strokes on the image, I wanted to add a gaussian blur to the mask.
Here are my adjustments in the gaussian blur window.

Here is where I am as of now and she is still a bit too orange. So I need to tone down the color and change the hue a bit.

Make a Hue/Saturation adjustment layer.

Select the reds from the drop down menu and add these adjustments to the Hue/Saturation Layer.

Your Hue/Saturation layer will be affecting the whole image at this point to to make it only affect the skin you are going to click on the mask on the layer below it and hold down option while you drag it to the Hue/Saturation layer.

You will be asked if you want to replace the mask, click yes.

 Here is the final tanned image. Good job everyone!!! If you have any questions feel free to email me at Kristina@KristinaSherk.com
 Please post your comments by clicking the link below. If you've got questions, please pose them in our Retouchers and Retouching Discussion Threads.


4 comments:
Bad Facebook profile pics be gone!
Snow White or Beach Bronze your stillll sexxxxxyyyy! Can we hit on skin - have you hit on skin? Cloning skin is so hard. I do love this and I've become a reader as I really need the help. Keep up the good work.
Good retouching work. Keep up the Good work. thanks.
Ctrl (Win) or Cmd (Mac) + click on your previous mask before opening your new hue/sat adjustment layer, saves a bit of time by reloading your selection ;)
Danny
Professional Retouching and Digital Art
Post a Comment